

Rainbow Deviled Eggs (colored with homemade food dye!)
Page 1 of 1

Rainbow Deviled Eggs (colored with homemade food dye!)
![]() by Nanneerose Wed Apr 16, 2014 7:37 am
by Nanneerose Wed Apr 16, 2014 7:37 am
Spring has finally sprung! Easter is coming. So I made these little celebratory morsels of delish the other day.

They're so fun to make, it's almost embarrassing. And while it must be said that for optimal entertainment, these should be made with your friends who are younger than 12, if you can't round up any kids for this one, don't worry, you will feel your own inner kid jumping for joy when you pull those brightly-colored eggs out of your own easy homemade dyes.

The dyes are made using foods that you'll probably have readily on hand in your kitchen: beets, red cabbage, and turmeric. Of course, this is only scratching the surface of the vast possibility of colors you can create from common foods (onion skins, hibiscus tea, black tea are just some of the other ones to try), but I wanted to keep it to three colors and relatively simple. Read how to make these easy dyes below. But first, the chickens deserve some thanks and acknowledgement.
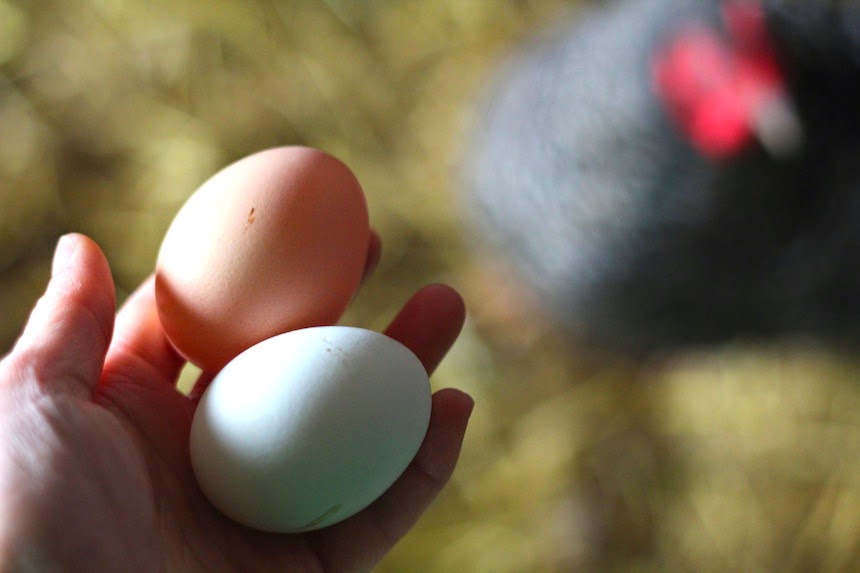
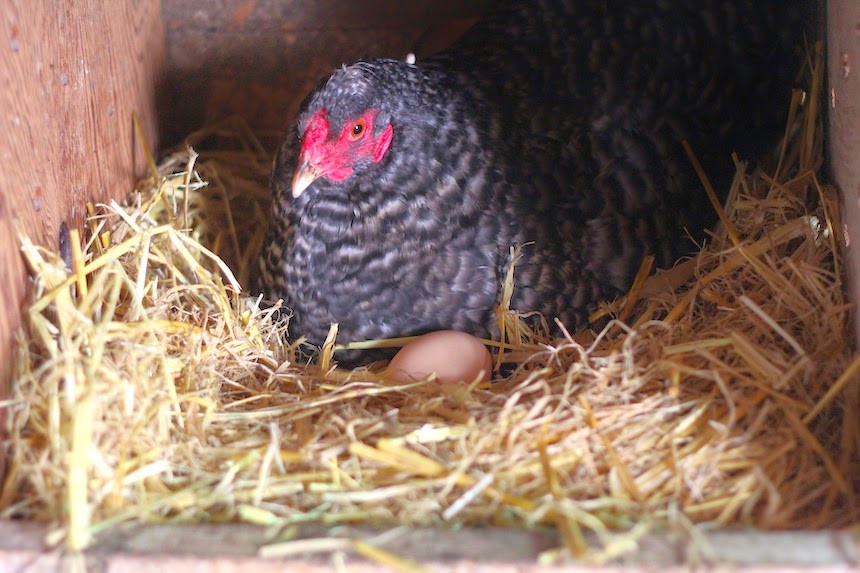
This recipe happened because there's been an overflow of eggs around the farm lately and I've been making every egg dish I can think of. We've been "chicken-sitting" for friends, so the chicken population suddenly doubled.

Not to mention this is the time of year when chickens suddenly go into marathon egg-laying mode.

One thing to keep in mind if you have access to farm-fresh eggs is that fresh-laid eggs don't peel very easily, so when making hard-boiled eggs, it's best to use eggs that are at least a few days old.

So here's how I went about making these deviled eggs. First… the dyes.
For the pink dye:
Combine 2 cups of water and 1 cup chopped beets. Boil for about 20 to 30 minutes.
Strain the solids out. Add 1 Tbsp vinegar and 1 tsp salt and stir.

For the blue dye:
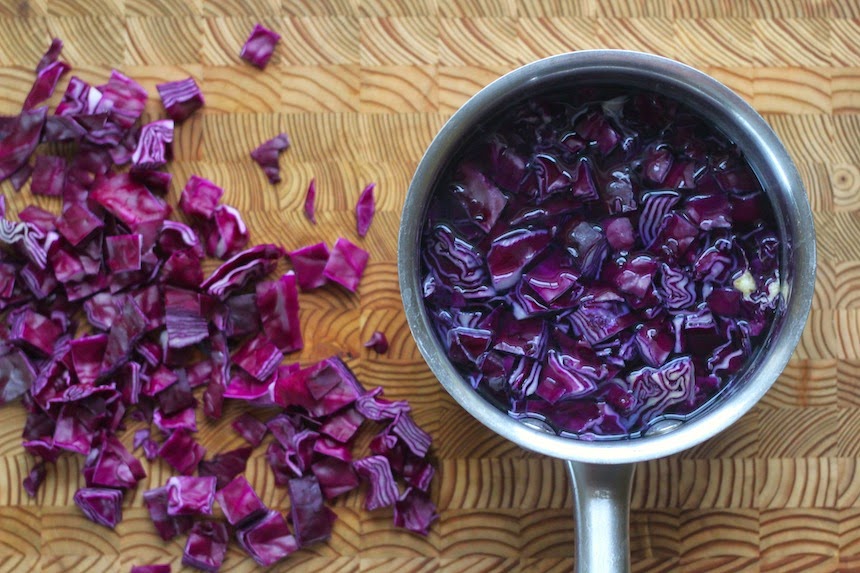
Combine 2 cups of water and 2 cups chopped red cabbage. Boil for about 20 to 30 minutes.
Strain the solids out. Add 1 Tbsp vinegar and 1 tsp salt. To turn the mixture blue, add 3/4 tsp. baking soda and stir.
 For the yellow dye:
Combine 2 cups of water and 1 Tbsp turmeric. Boil for about 20 to 30 minutes.
Strain the solids out. Add 1 Tbsp vinegar and 1 tsp salt and stir.

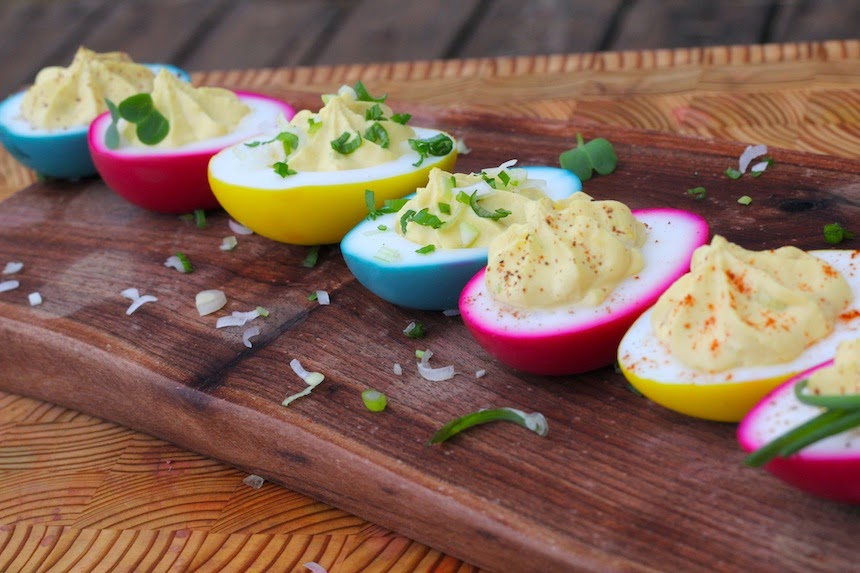
To dye the eggs, you will first need to hard-boil them and peel them. You then plop them in the dyes and let the magic begin. The longer you leave them in, the brighter the colors. I left mine in for about one hour and this is how they turned out.

And this is what one of my cutting boards looked like once I was done with this recipe.

Once your eggs are dyed to your liking, you can go ahead and make the deviled eggs as you normally would. Use your own favourite deviled egg recipe, or skip the mayonnaise and try my easy Greek yoghurt recipe on PBS Food. (I promise these are so good you won't even miss the mayo!)
Happy Easter!


They're so fun to make, it's almost embarrassing. And while it must be said that for optimal entertainment, these should be made with your friends who are younger than 12, if you can't round up any kids for this one, don't worry, you will feel your own inner kid jumping for joy when you pull those brightly-colored eggs out of your own easy homemade dyes.

The dyes are made using foods that you'll probably have readily on hand in your kitchen: beets, red cabbage, and turmeric. Of course, this is only scratching the surface of the vast possibility of colors you can create from common foods (onion skins, hibiscus tea, black tea are just some of the other ones to try), but I wanted to keep it to three colors and relatively simple. Read how to make these easy dyes below. But first, the chickens deserve some thanks and acknowledgement.

This recipe happened because there's been an overflow of eggs around the farm lately and I've been making every egg dish I can think of. We've been "chicken-sitting" for friends, so the chicken population suddenly doubled.

Not to mention this is the time of year when chickens suddenly go into marathon egg-laying mode.
One thing to keep in mind if you have access to farm-fresh eggs is that fresh-laid eggs don't peel very easily, so when making hard-boiled eggs, it's best to use eggs that are at least a few days old.

So here's how I went about making these deviled eggs. First… the dyes.
For the pink dye:
Combine 2 cups of water and 1 cup chopped beets. Boil for about 20 to 30 minutes.
Strain the solids out. Add 1 Tbsp vinegar and 1 tsp salt and stir.

For the blue dye:
Combine 2 cups of water and 2 cups chopped red cabbage. Boil for about 20 to 30 minutes.
Strain the solids out. Add 1 Tbsp vinegar and 1 tsp salt. To turn the mixture blue, add 3/4 tsp. baking soda and stir.
Combine 2 cups of water and 1 Tbsp turmeric. Boil for about 20 to 30 minutes.
Strain the solids out. Add 1 Tbsp vinegar and 1 tsp salt and stir.

To dye the eggs, you will first need to hard-boil them and peel them. You then plop them in the dyes and let the magic begin. The longer you leave them in, the brighter the colors. I left mine in for about one hour and this is how they turned out.

And this is what one of my cutting boards looked like once I was done with this recipe.

Once your eggs are dyed to your liking, you can go ahead and make the deviled eggs as you normally would. Use your own favourite deviled egg recipe, or skip the mayonnaise and try my easy Greek yoghurt recipe on PBS Food. (I promise these are so good you won't even miss the mayo!)
Happy Easter!


Nanneerose- Admin
- Posts : 1586
Join date : 2014-02-14
Age : 56 -

» Creamy Scrambled Eggs
» Grilled Asparagus and Fried Eggs with Sage
» How To Make Restaurant Style Poached Eggs
» CRAZY CAKE RECIPE (NO EGGS, MILK, BUTTER OR BOWLS)
» HOMEMADE KETCHUP
» Grilled Asparagus and Fried Eggs with Sage
» How To Make Restaurant Style Poached Eggs
» CRAZY CAKE RECIPE (NO EGGS, MILK, BUTTER OR BOWLS)
» HOMEMADE KETCHUP
Page 1 of 1
Permissions in this forum:
You cannot reply to topics in this forum
» Crypto Price Crash: As Bitcoin And Ethereum Collapse, Elon Musk Brands Radical Dogecoin Plan A ‘Great Idea’
» Co-Impact Sourcing - Rose
» Co-Impact Sourcing - Lemon
» Doterra's Co-Impact Sourcing, The Doterra Difference
» How to Build a Firepit
» How To Make Bar Soap Yourself
» How to Grow Blueberries
» Bring On the Cheer
» Natural Homemade Plant Fungicide Works A Treat
» The Best Lemon Impossible Pie Recipe
» How To Make A Rainbow Unicorn Cheesecake
» How To Tint Jars And Bottles The Easiest Way
» Low Light Loving Plants You Can Grow Anywhere
» 11 Natural Ways to Reduce Symptoms of Menopause
» ONE DRAGONFLY CAN EAT HUNDREDS OF MOSQUITOS A DAY. KEEP THESE PLANTS IN YOUR YARD TO ATTRACT DRAGONFLIES
» Positive Things To Say To Your Child
» Aluminum Foil And Baking Soda Jewelry Cleaner
» How To Repot Orchids The Correct Way at Home
» Fill Your Garden With Butterflies